
Proxies
How to add proxies to CRM Mate for auto-login (AstroProxy).
Autologin in CRM Mate is a mechanism that automatically signs a user into their personal account after registration. In the crypto vertical, it is used to record the transition of a newly registered user after a form is submitted on a landing page and to verify traffic quality. During this transition, not only the authorization event itself is taken into account, but also technical parameters such as the IP address and device characteristics. For this reason, proper proxy configuration is important when working with autologin. In this article, we show step by step how to add proxies for autologin in CRM Mate using AstroProxy as an example.
1) Add a port
Open your AstroProxy account dashboard, create a port, and click “Add port”.

2) Set port parameters
After creation, the “Port parameters” window will open. These settings determine which proxies you get and how they will operate for auto-login:
-
Number of required proxies;
-
Network type;
-
Country the proxies are needed for;
-
Channel (port) name. Choose the network type depending on your task and the IP source. The following network types are available:
-
“Datacenter” — data centers, cloud hosting (Rackspace, Softlayer, AWS);
-
“Mobile” — mobile networks (MTS, Tele2, Beeline, etc.);
-
“Residential” — home internet providers (roughly, “home internet”). In our case, we select “Residential”, because these IPs usually work better for stable sessions.
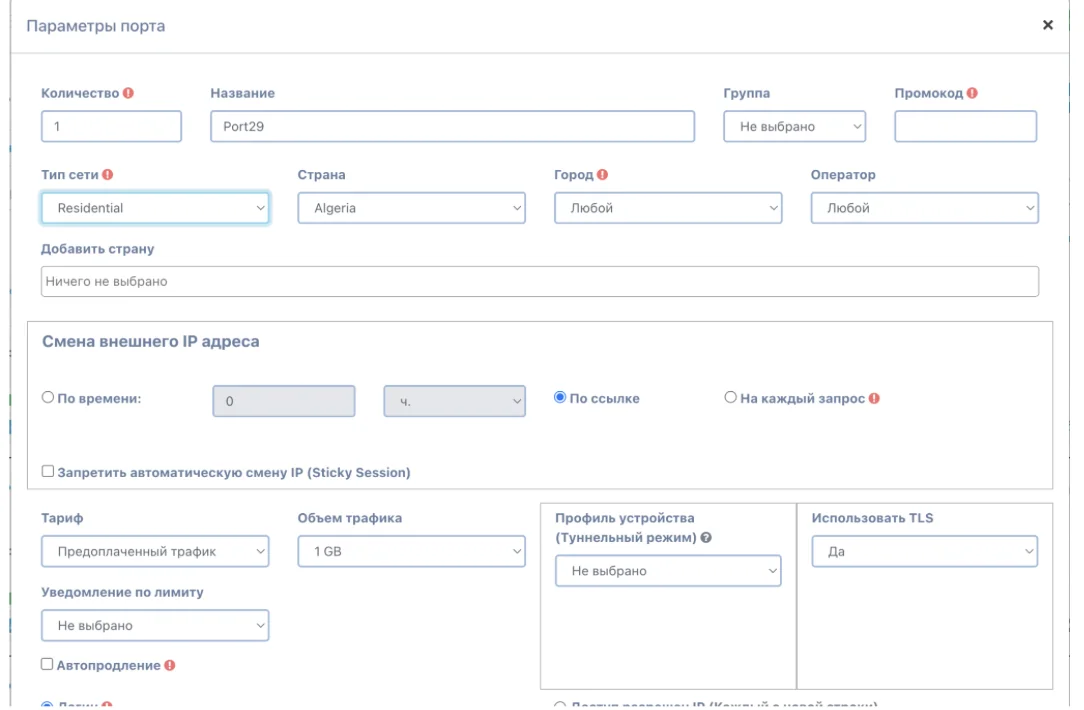
For auto-login, always set the IP change method to “By link”. This is a controlled rotation mode: the IP changes only when you trigger the change via the link, not during an active session.

In some services, two options may be available: “Every request” and “By link”. In this case, for this scenario we still choose “By link” only.
3) Choose a pricing plan
In the pricing plan field, select “Pay-as-you-go” (payment based on actual usage).
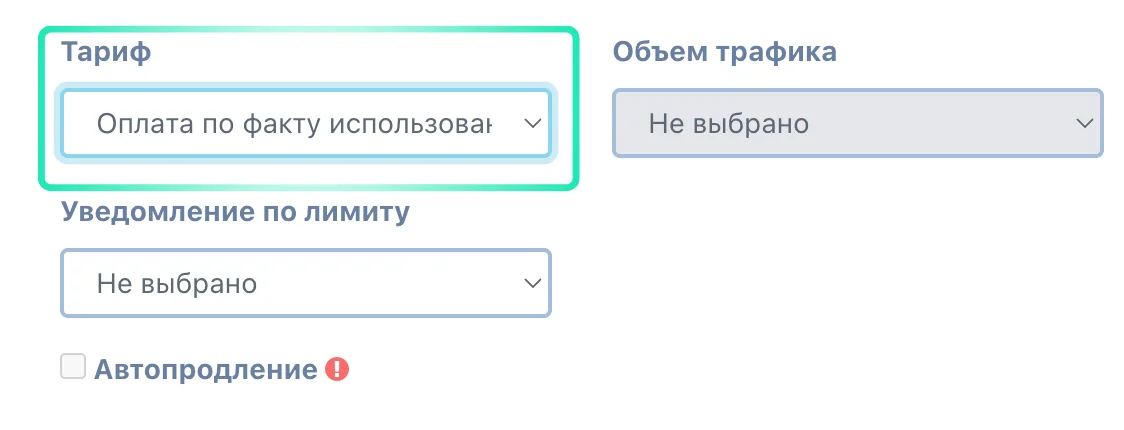
4) Save changes
After setting the parameters, click “Save”. The port will appear in the list and can be exported.
5) Export the port
Go back to the list of ports, select the required one, and click “Export selected”.
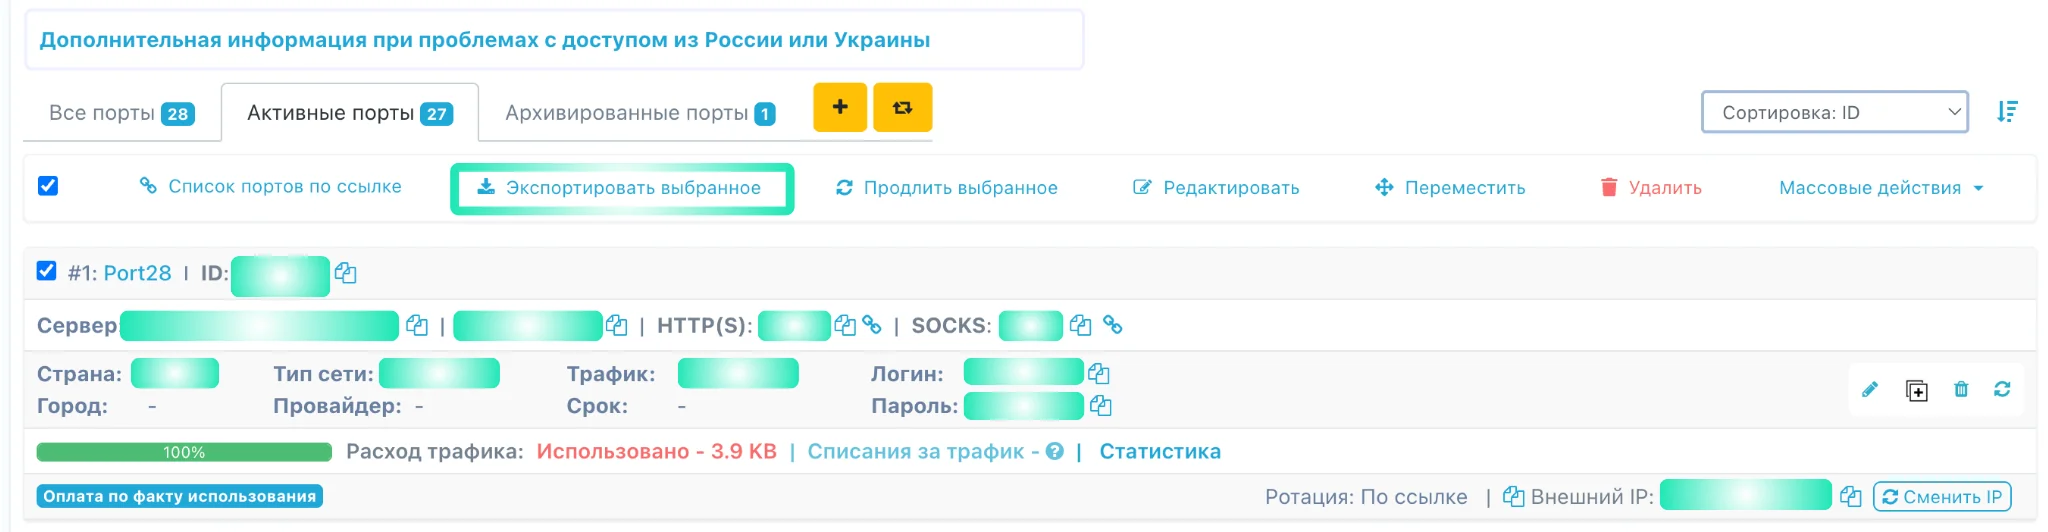
A window will appear where you need to enter the template. It should look like this:
{ip}:{port}:{login}:{password}|https://{link}
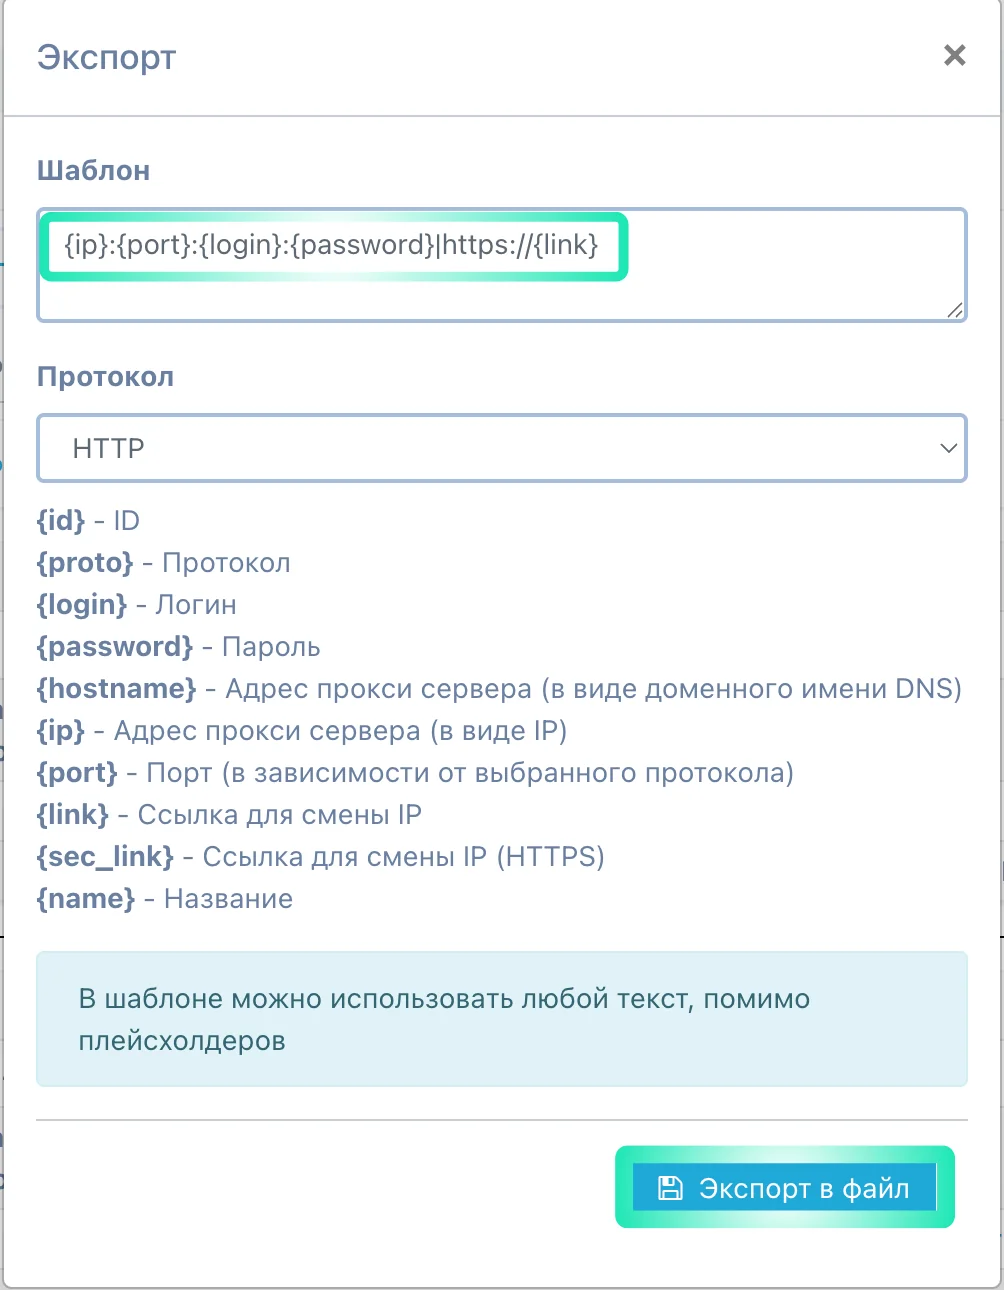
In the “Protocol” field, keep “HTTP”, then click “Export to file”.
6) Add proxies to CRM Mate
After exporting, open the downloaded file, copy all its contents, and go to CRM Mate.Open “Setting”, select “Country group”, then open “Proxies” and click “+Add”. In the proxy add window, paste the copied text and click “Create”.
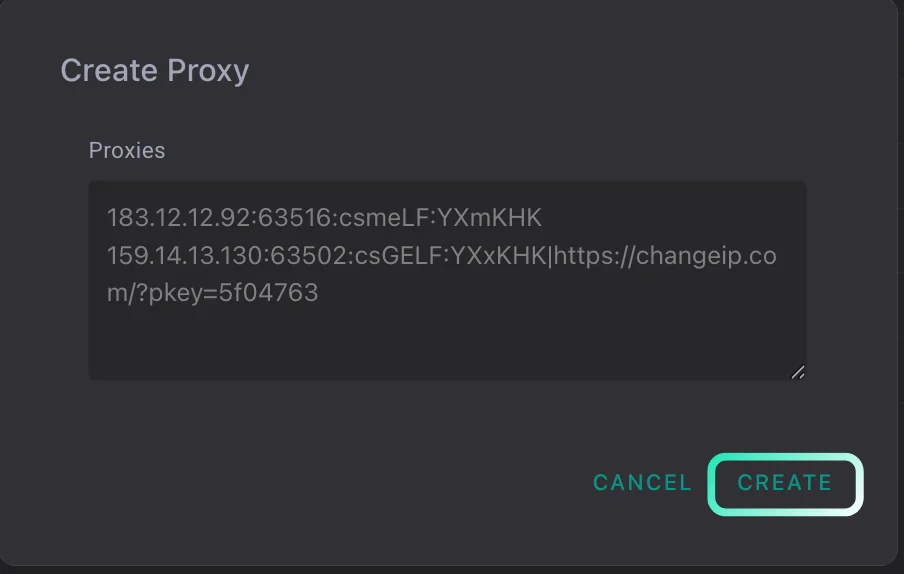
After adding, the proxies will appear in the list and will be available for use in the required group. If everything is done correctly, the import will process properly and the proxy lines will be stored in the system in the same format as in the export file. After that, you can proceed to working with accounts in auto-login.