
Third-Party Webmaster Integration
Step-by-step guide for setting up a third-party webmaster integration via the CRM Mate API.
In CRM Mate, all integrations work through the API. Therefore, if a webmaster plans to send traffic to you, they must configure the integration independently. On your side, you only need to provide the required data and complete the basic setup.
- Webmaster Registration
Ask the webmaster to provide an email address or create one yourself. The email address is used only to log in to the system.
Open the Users section.
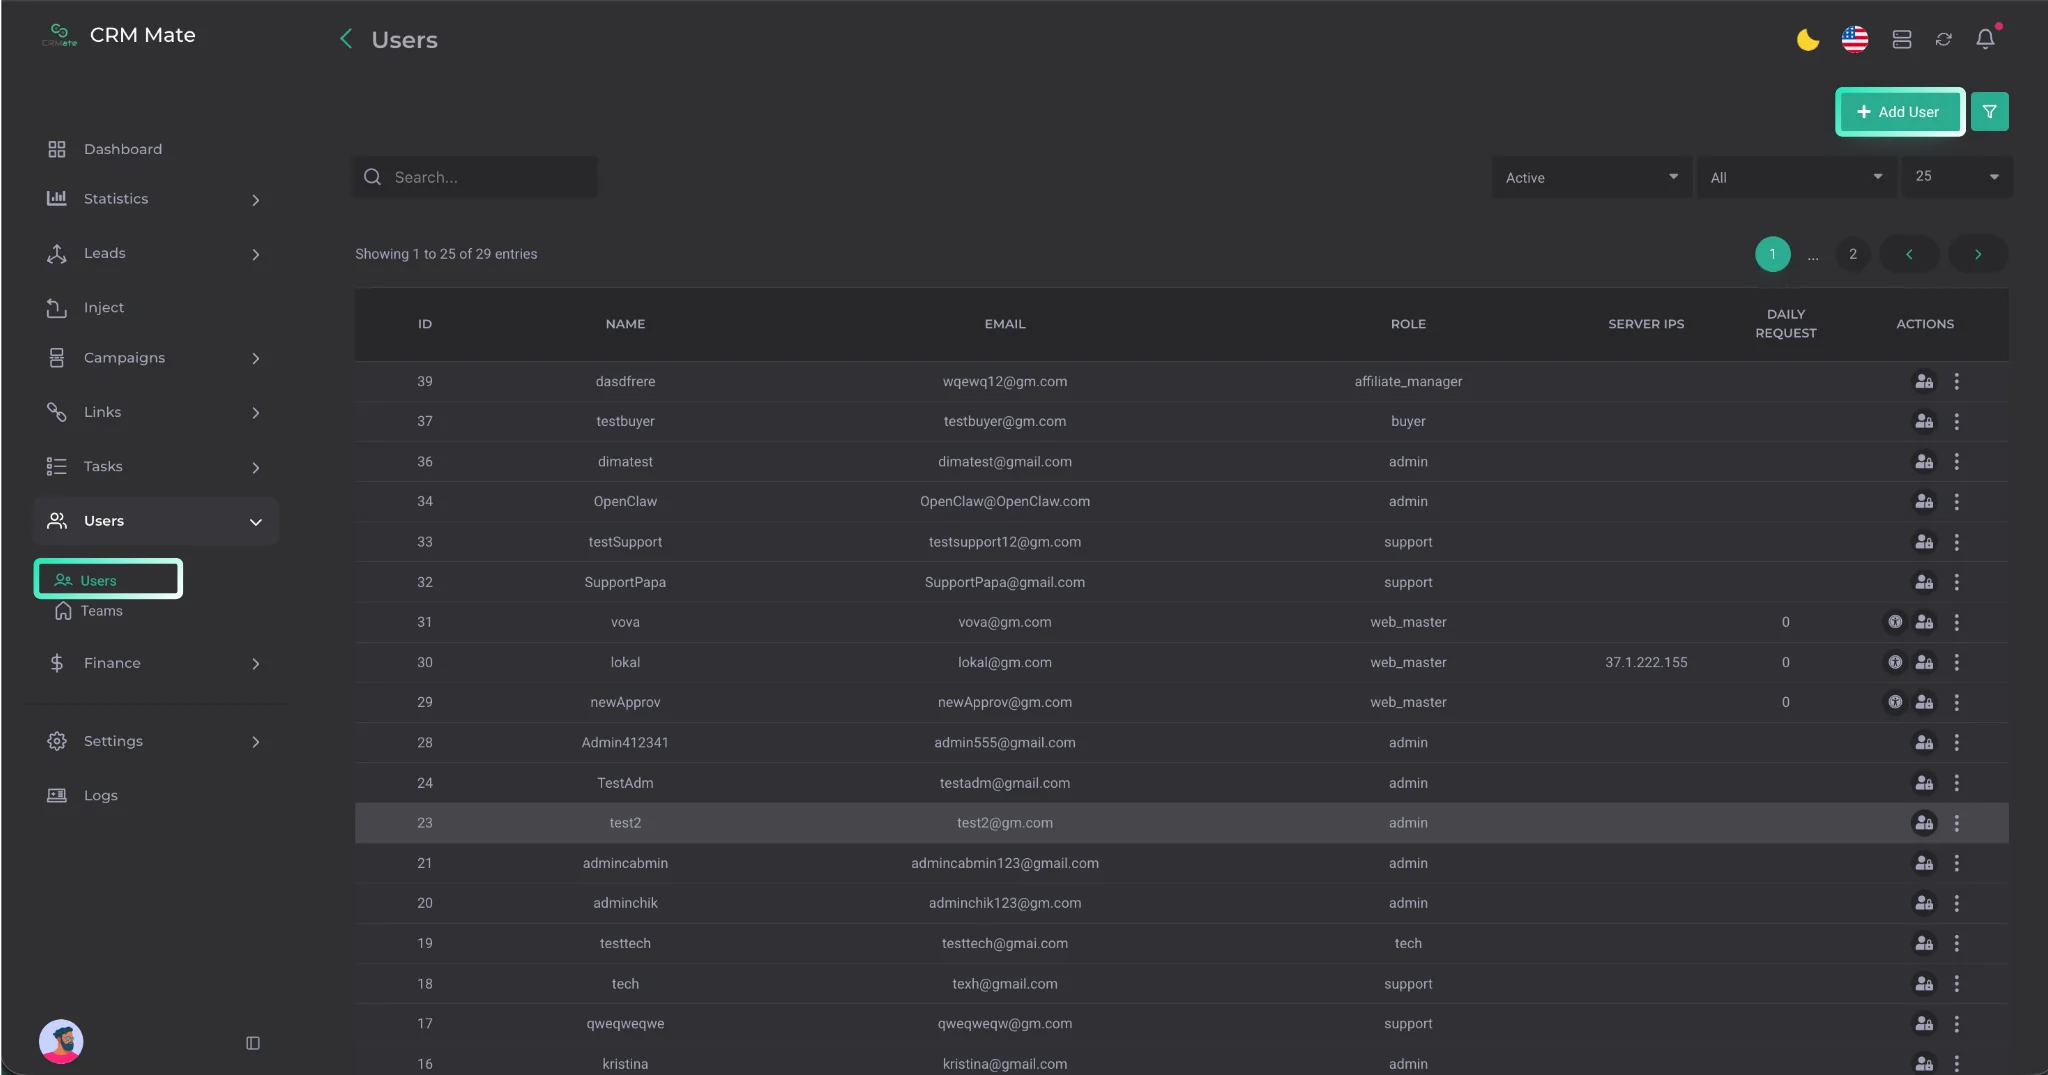
Click Add User and create a new user with the web_master role.
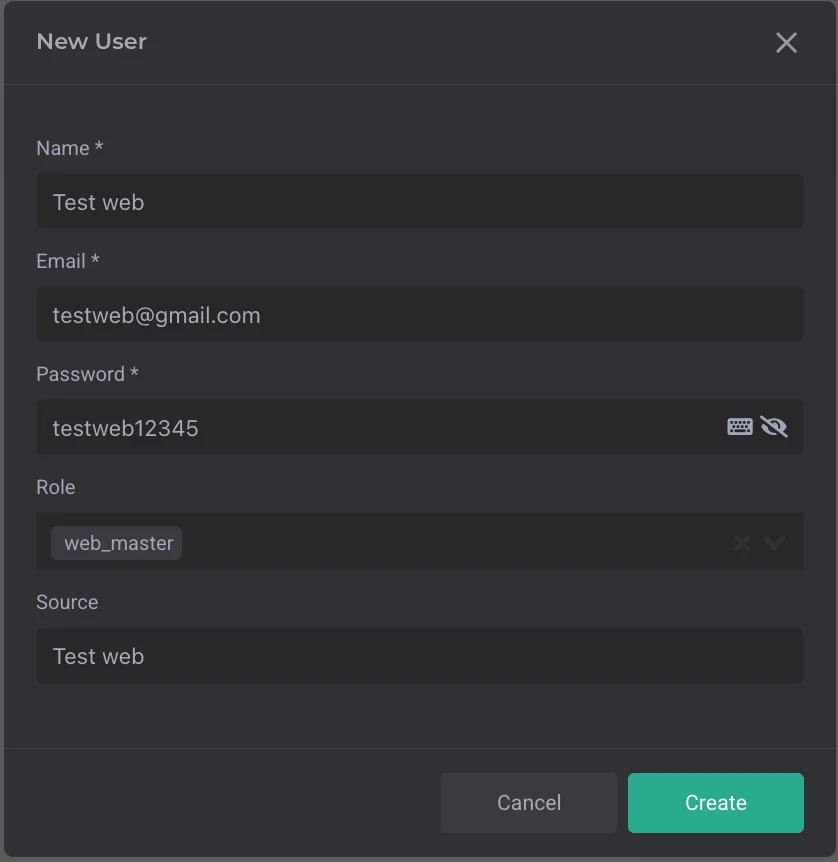
- Providing Data to the Webmaster
You need to provide the webmaster with the following data:
-
Login (email) — the email address created during registration;
-
Password — the password specified when creating the user;
-
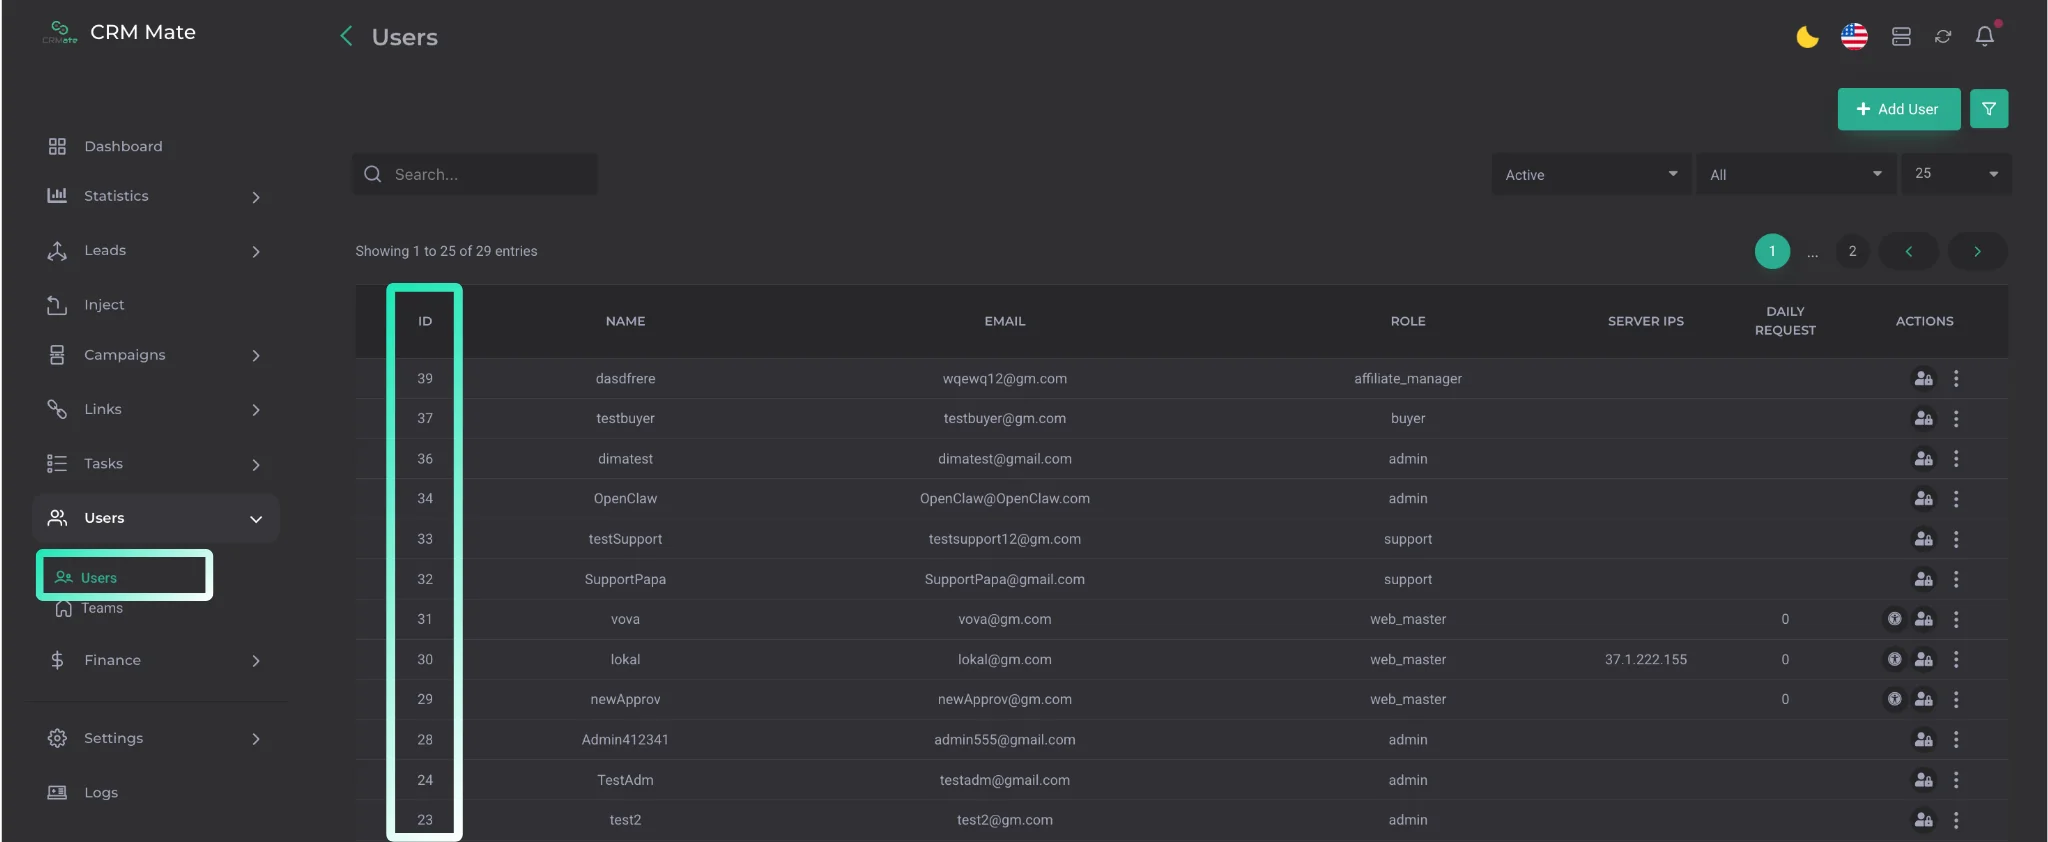
user_id — the webmaster’s identifier in the system, which can be found in the Users section;
-
source — the name of the traffic source used for identification. Usually, it matches the user’s name;
-
Token — the access token, which can be copied from the user’s page.
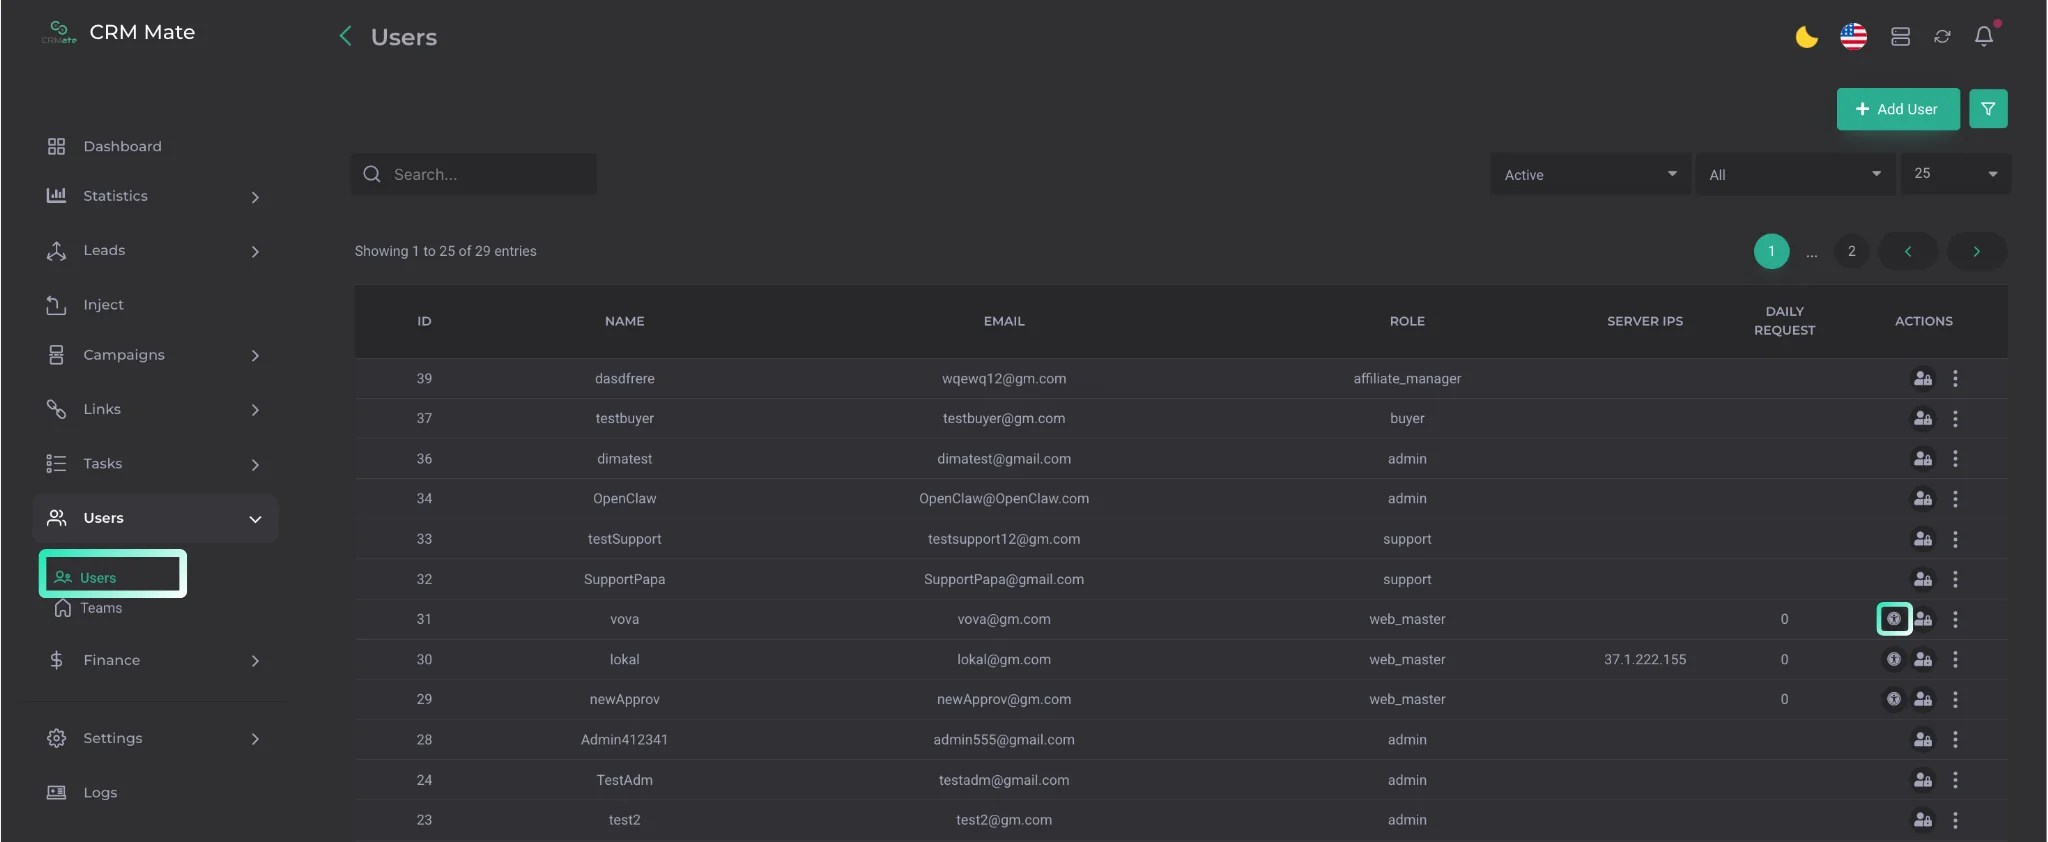
Example of data to provide to the webmaster:
Login: [email protected]
Password: testweb12345
user_id: 11
source: Test web
Token: eyJ0eXAiOiJKV1Q**********************_Bw
Together with this data, we provide a template for sending and exporting leads. You can request it in the work chat. Usually, the template is already pinned in the messages if it has previously been provided to other webmasters.
Example:
Integration:
Sending leads:
{
"url": "https://crm.yourdomain.live/api/leads",
"method": "POST",
"request_headers": [
{
"Content-Type": "application/x-www-form-urlencoded",
"Accept": "application/json"
}
],
"request_body": {
"full_name": "{firstname} {lastname}",
"country": "{country}",
"email": "{email}",
"landing": link to the funnel”,
"phone": "{phone}",
"user_id": "Your ID in our system",
"ip": "{ip}",
"source": "Your nickname in our system,
"keitaro_id": {sub_id}, // if a postback is needed, this field is optional
“description”: “Comments”, // optional field
“landing_name”: “Funnel name”
}
}
Exporting leads:
curl --location --request GET 'https://crm.yourdomain.live/api/web-master/leads' \
--header 'Authorization: Bearer TOKEN' \
--header 'Content-Type: application/json' \
--data-raw '{
"page": "1",
"per_page": 500,
"date_start" : "2022-05-05",
"date_end" : "2022-05-05"
It is important that you specify the funnel names exactly in the landing_name field — in the same form in which they are passed to CRM. The offer will be opened for you based on this data.
❗️Important: if you change the funnel name in the landing_name field, make sure to inform us about it in the work chat. Otherwise, your leads may be automatically rejected.
This will allow the settings to be updated quickly and help avoid unnecessary issues in the workflow.
Opening the Offer and Receiving a Test Lead
First, you need to clarify with the webmaster what name will be passed in the landing_name parameter. After receiving this name, go to the Funnels tab and add the corresponding funnel to the list.
This will allow us to correctly configure the offer and ensure that the test lead is accepted.
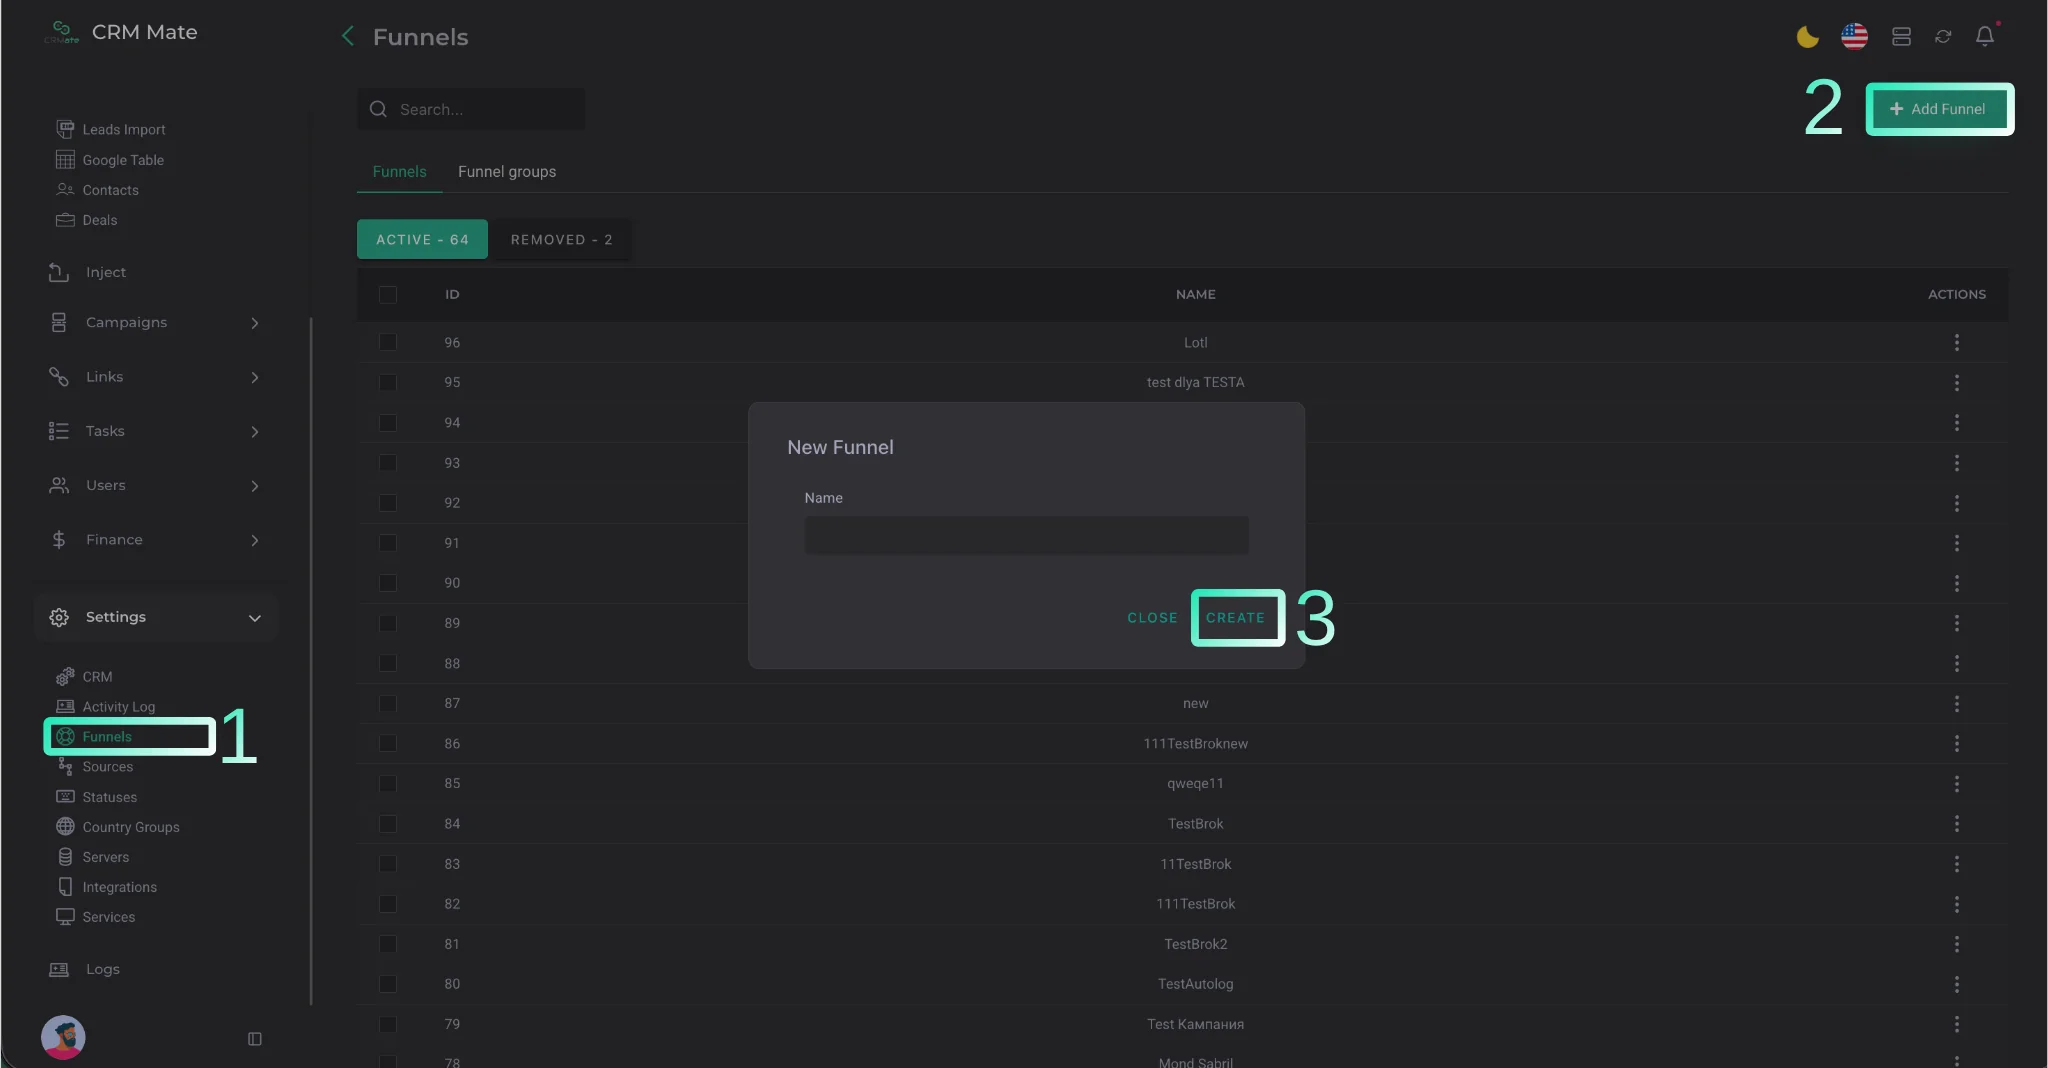
An alternative way to add a funnel to the list is to run a test with the required funnel. Any funnel that enters CRM Mate automatically appears in this list.
In this case, the webmaster will need to run two tests:
-
The first one — so that the funnel appears in the system and can be added to the campaign. In this case, the lead will be displayed as “rejected”;
-
The second one — after the offer has been configured on your side. After that, you can proceed to campaign setup to complete the integration. In the campaign settings, you need to specify:
-
user — the webmaster;
-
source — the webmaster;
-
funnel — the webmaster;
-
GEO to which you agreed to send the test lead. (LINK TO THE CAMPAIGN SETUP SECTION)
If everything is configured correctly, leads will start coming into the required offer without any additional actions. The system will automatically distribute them according to the specified parameters, and the results can be tracked in real time.
Before launching, it is recommended to check the campaign settings once again to avoid possible errors in the future.
If the webmaster asks you to update the status or specify FTD for a test lead, this can be done in two ways:
- Click on the lead number.
- Or click on the three dots in the ACTION column. In the window that opens, click the “Edit” button to update the required data.
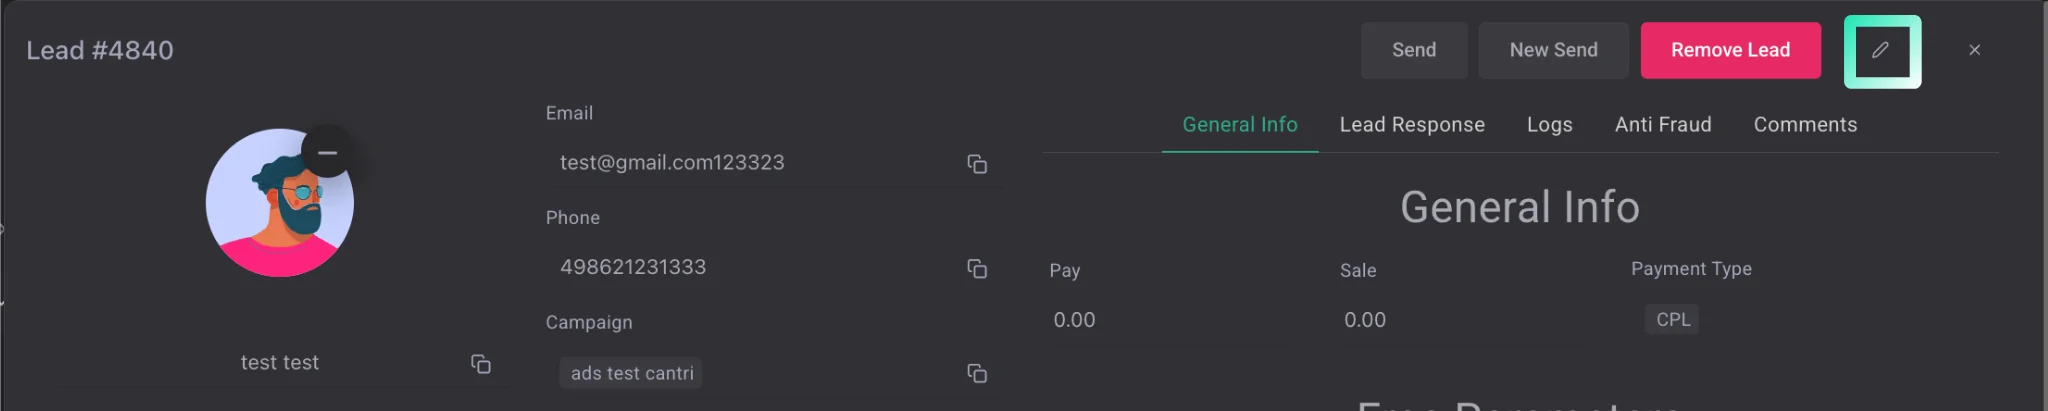
After that, change the status and check the box next to the Conversion field.
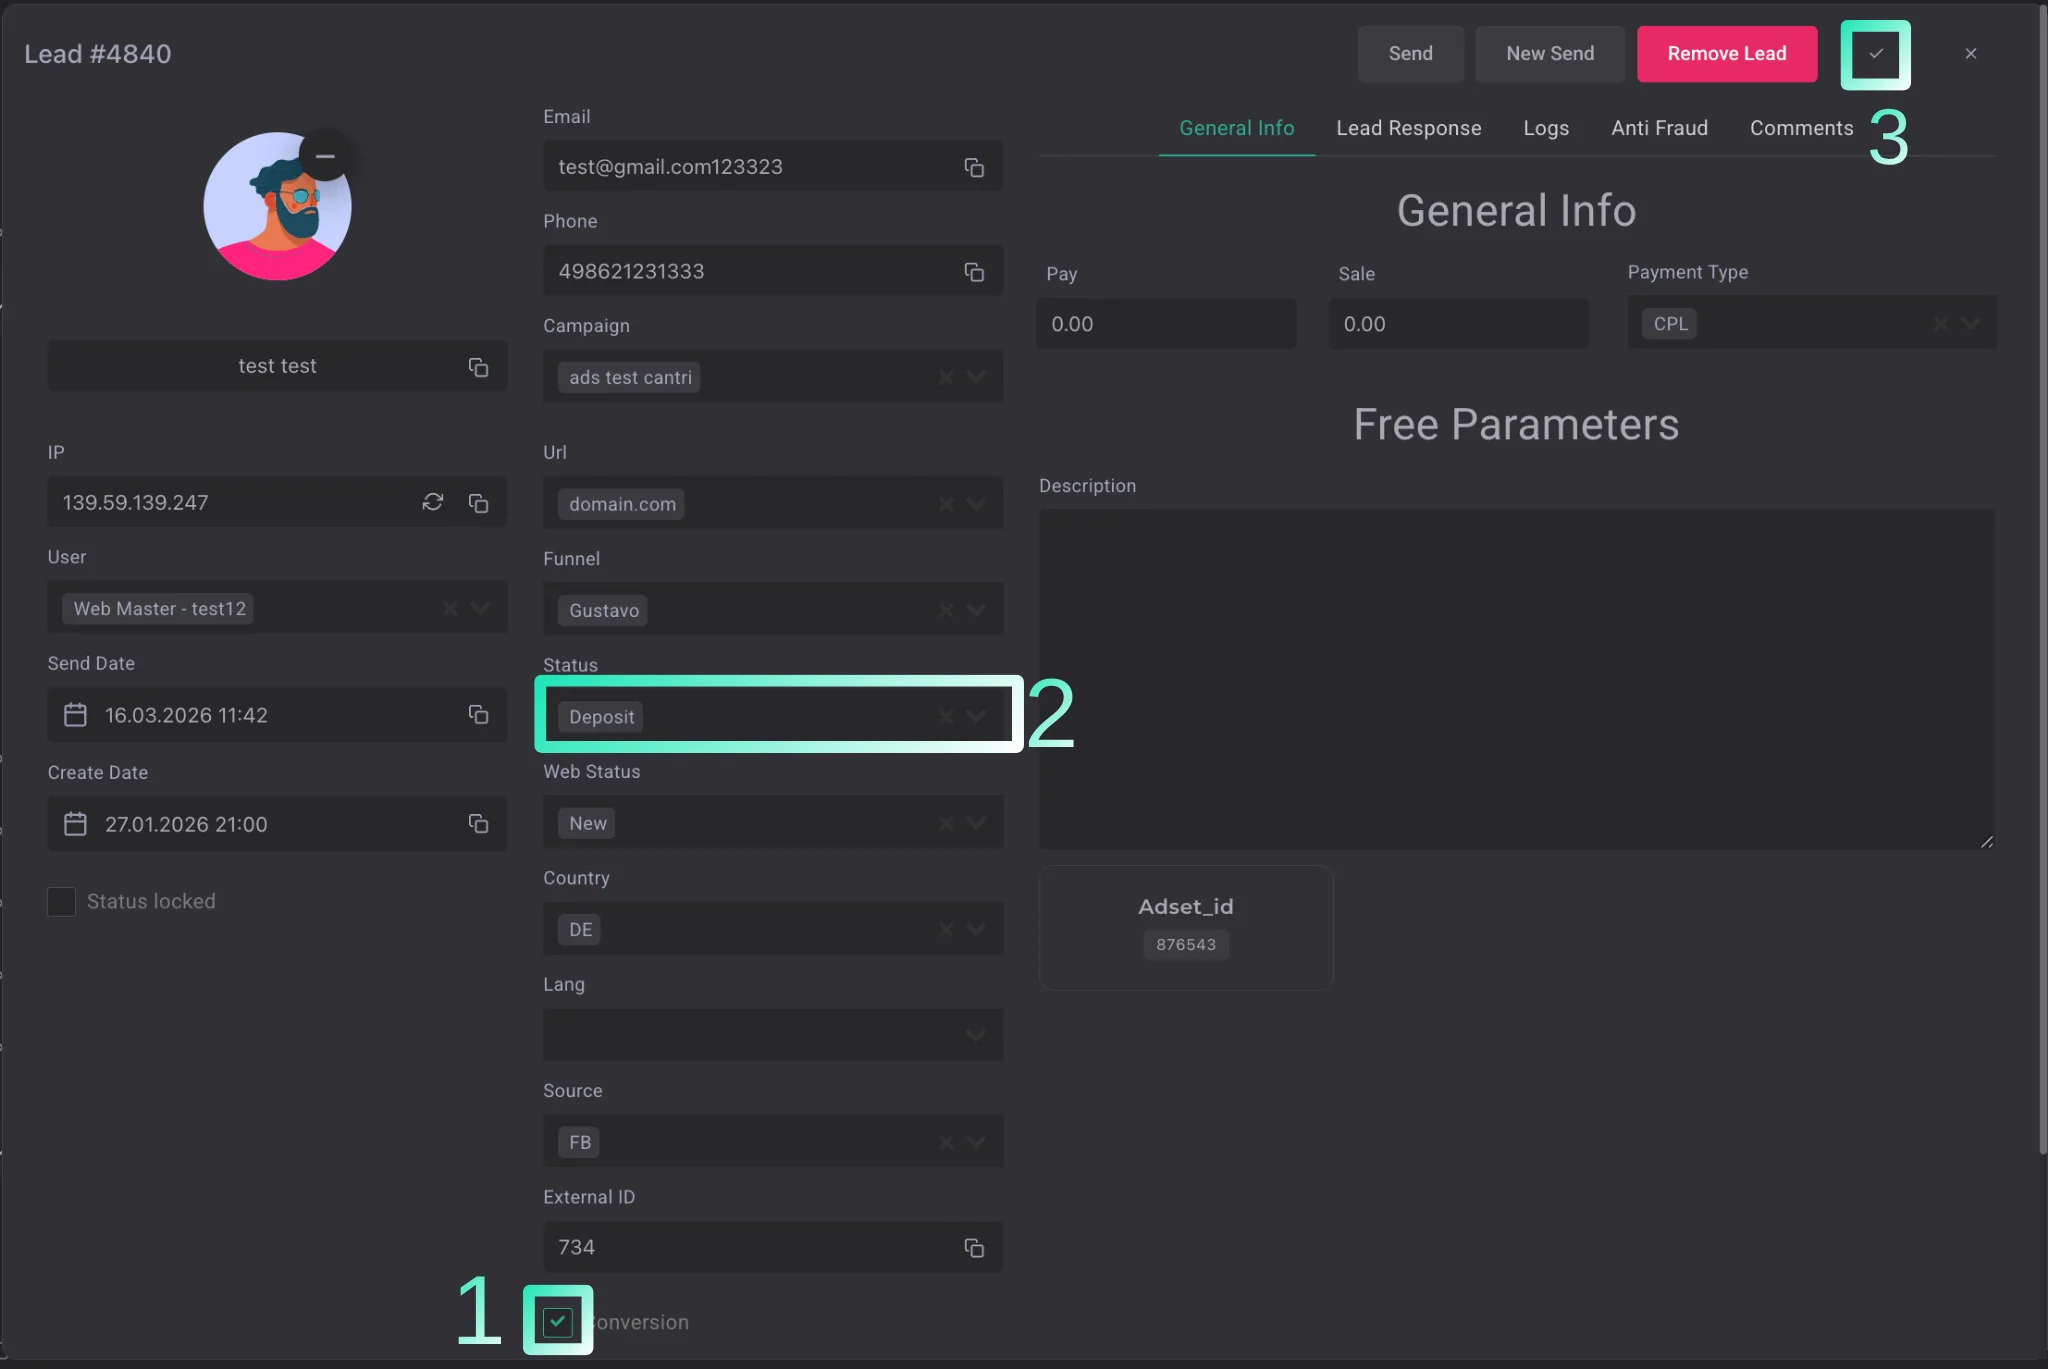
After completing these actions, the integration will be fully completed.
Links